We’ve all been there. You insert your read only SD card to move a handful of photos or perhaps back up some files, and bang!
You’re greeted with an error message such as “The disk is write protected” or “Windows was unable to complete the format.“
Frustrating, right?
If your SD card went read-only for no reason, don’t freak out. It doesn’t necessarily mean your card is dead or your files are lost forever.
Sometimes it’s easier to fix than you might think. You just have to know where to look.
This guide will take you through the process of removing read only SD card protection and formatting your SD card in a matter of minutes, with simple instructions anyone can manage.
Why Does an SD Card Become Read Only?
Here’s what could be messing with your card:
- Physical Write-Protect Switch: Some SD cards have a small switch on the side. Positioning it to “lock” will stop your system from allowing any change. It works like a manual safety.
- Corrupted File System: The file system may be harmed if your SD card was removed improperly or used on multiple devices (for example, a laptop and a camera), particularly if it is FAT32.
- Windows Registry Settings: Your SD card may be unknowingly blocked on this system by Windows. This usually occurs on restricted computers, for example.
- Software Bugs or Malware: Some software can lock your card either through a bug, a virus, a mischievous implementation of a measuring tool, or compromised updates.
- Wear and Tear: Like all technology, SD cards die eventually. An older card can fail silently, usually starting with locking in read only SD card mode as its first call for help.
How to Format Read Only SD Card?
Step 1: Remove Read Only SD Card
Let’s unlock that card! Pick the method that fits your situation best:
1. Flip the Physical Lock Switch
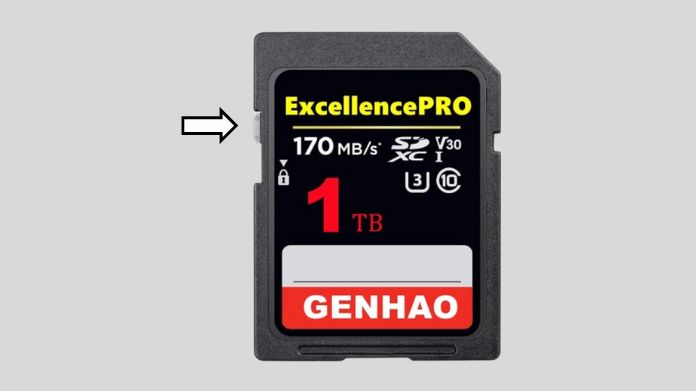 It’s basic, but often overlooked.
- Remove the card from your device
- Look for a tiny slider switch on the side
- Slide it to the “unlock” position
- Reinsert and try again
2. Use Command Prompt (Diskpart Method)
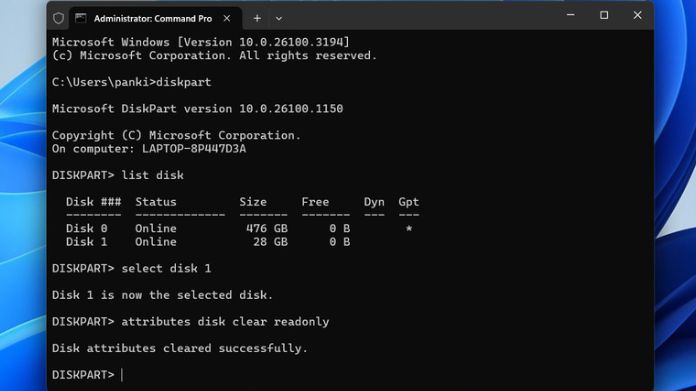 Great for Windows users who like getting their hands a bit dirty (digitally speaking).
Steps:
- Open Command Prompt as admin
- Type:
diskpart
- Then:
list disk
- Find your SD card and type:
select disk # (replace # with your card's number)
- Type:
attributes disk clear readonly
- Done! Close everything and recheck your card.
3. Edit Windows Registry (Advanced Users)
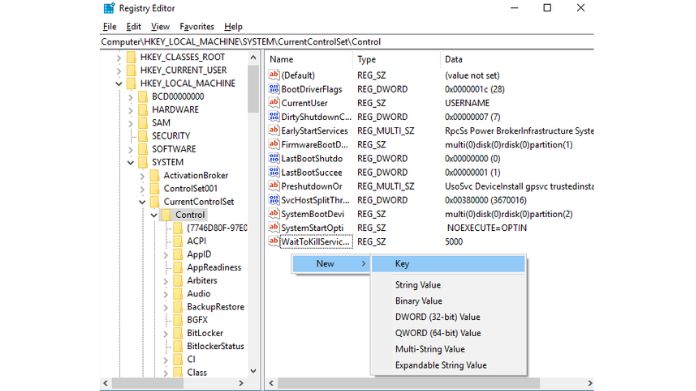
If Diskpart was ineffective, the Windows Registry could have an issue.
Here’s how to fix it:
- Press Win + R, type regedit, and hit Enter
- Navigate to:
HKEY_LOCAL_MACHINE\SYSTEM\CurrentControlSet\Control\StorageDevicePolicies
- Look for a key named WriteProtect
- Double-click and set its value to 0
- If it’s not there, create it manually (DWORD 32-bit)
- Restart your PC
5. Convert the File System from FAT32 to NTFS
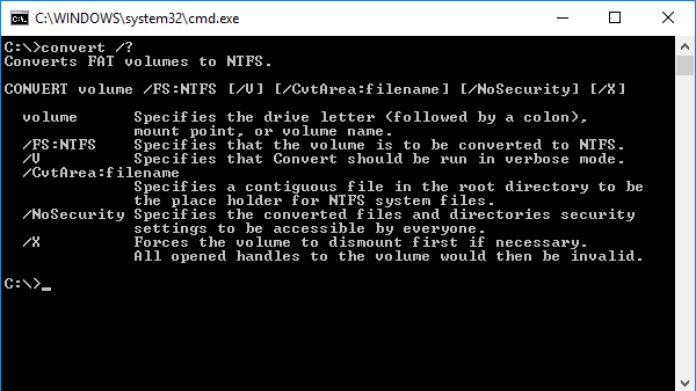 If your card’s file system is the issue, changing it can help.
In Command Prompt:
convert X: /fs:ntfs (replace X with your SD card's drive letter)
Heads up: This doesn’t erase data, but switching back to FAT32 later will require formatting.
Use tools like AOMEI Partition Assistant if you want to do it without losing anything.
Step 2: Format the SD Card
If you have successfully turned off the write protection, then the following steps will lead you format your card correctly.
Option 1: Format Using File Explorer (Windows)

- Plug in the card
- Open File Explorer
- Right-click > Format
- Choose a file system: FAT32, NTFS, or exFAT
- Click Start
Option 2: Use Disk Management
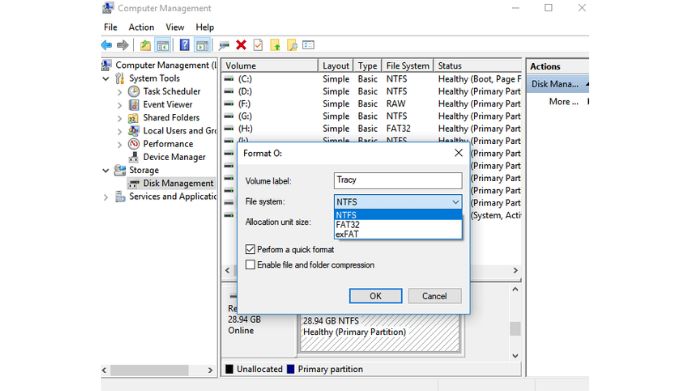
- Right-click Start > Disk Management
- Find your SD card
- Right-click > Format or Delete Volume, then create a new one
Great for larger or corrupted drives.
Option 3: Use SD Card Formatter
 The official SD Card Formatter tool, developed by the SD Association, is the most dependable and SD card-friendly formatting choice.
This software really only works with SD, SDHC, and SDXC cards, in contrast to other SD card formatters.
It guarantees that your card is at least as good as it’s rated, it’s set up properly, doesn’t wear unneccessarily and lasts as long as it should.
How to use it:
- Download and install SD Card Formatter from the official website.
- Insert your SD card and open the program
- Select the correct drive
- Click Format — that’s it!
Pro Tips to Prevent This in the Future
- Always eject your SD card properly before removing it
- Avoid using cheap or worn-out cards, as they fail faster
- Back up your files regularly
- If you use SD cards for cameras, format them in-camera, not on a computer
Final Thoughts
Dealing with read only SD cards can be horrible, but now you know it doesn’t end there. There is always a way out, that is, from a simple switch to an inscrutable system setting.
You can safely and quickly format your SD card and remove write protection by following the above steps. Additionally, there won’t be any worries or panics, just solutions.
Stay tech-smart and always back up your stuff!


