Having spent hours setting up your Raspberry Pi, whether it be for making changes, installing packages, or managing projects on the device, you know how frustrating it can be to lose all that progress.
I’ve been there. I finally got a working smart mirror build, but one corrupted SD card erased everything and taught me the hard way about backups.
How important is this? The reason is simple – you can clone Raspberry Pi SD card.
Cloning allows you to see your entire configuration, so you can restore it at any time, upgrade to a bigger card, or experiment with something entirely different, rather than having to start over.
And the good news? The level of difficulty is greater than what you initially assumed.
We will demonstrate how to clone Raspberry Pi SD card using simple steps on Windows, macOS, Linux, or the Pi itself.
What You’ll Need Before Getting Started?
Let’s gather the basics before proceeding. What you need is presented below:
- Your current Raspberry Pi SD card (the one you want to clone).
- A second SD card or SSD (ideal for upgrades or backup).
- A card reader or USB adapter for your computer (especially handy for format SD cards and restoring backups).
- Enough free storage on your PC to hold a full image of your SD card.
- Cloning software or command-line tools, depending on your OS.
Pro tip: Make sure the second card or SSD has equal or more storage than the one you’re cloning. Otherwise, you’ll hit a wall.
How to Clone Raspberry Pi SD Card on Windows?
 If you’re on Windows, Win32 Disk Imager is your best friend. It’s free, lightweight, and super straightforward.
Step 1: Create the Image File
- Insert your original Pi SD card into the computer.
- Open Win32 Disk Imager.
- Choose a location and filename to save your image (e.g., raspberry_backup.img).
- Select your SD card from the device list.
- Hit “Read”, this copies your SD card to an image file on your PC.
Step 2: Restore the Image to a New Card
- Insert your new SD card.
- In Win32 Disk Imager, select the same image file.
- Choose the new card as your target device.
- Hit “Write“ to clone the image to the new card.
And that’s it! You’ve just made a clone.
How to Clone Raspberry Pi SD Card on Linux?
For the command-line savvy, Linux gives you full control using the dd command.
Step-by-Step Using dd
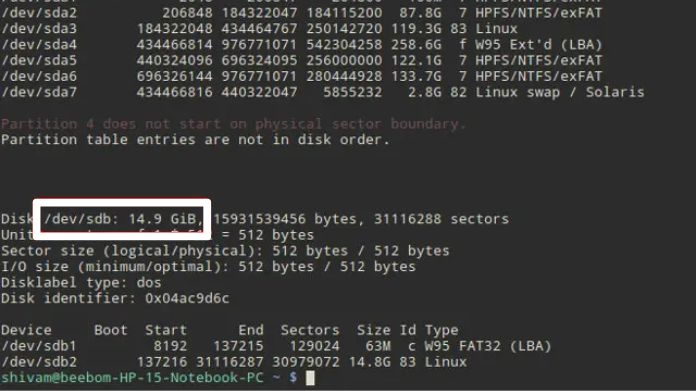
Step 1: Identify the Right Device
Run:
sudo fdisk -l
or
lsblk
This shows you your SD card’s device name (e.g., /dev/sdb). Be careful, choosing the wrong drive can be disastrous.
Step 2: Backup the Card
sudo dd if=/dev/sdX of=~/pi_backup.img bs=4M status=progress
(Replace sdX with your actual device name.)
Step 3: Restore to Another Card

sudo dd if=~/pi_backup.img of=/dev/sdY bs=4M status=progress
How to Clone Raspberry Pi SD Card on macOS?
macOS users can also get it done with a bit of Terminal magic.
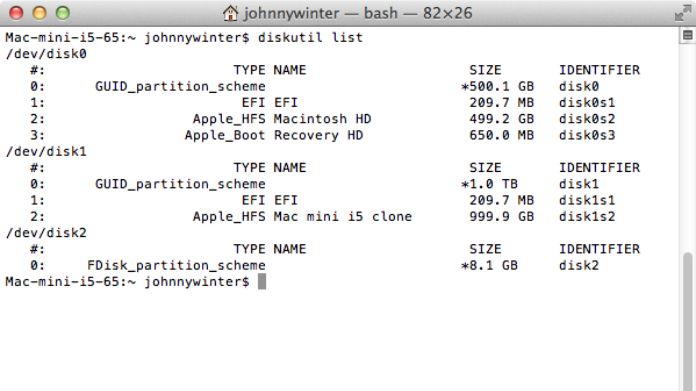
Step 1: Identify the SD Card
diskutil list
Step 2: Unmount the Card
diskutil unmountDisk /dev/diskN
Step 3: Use dd to Clone
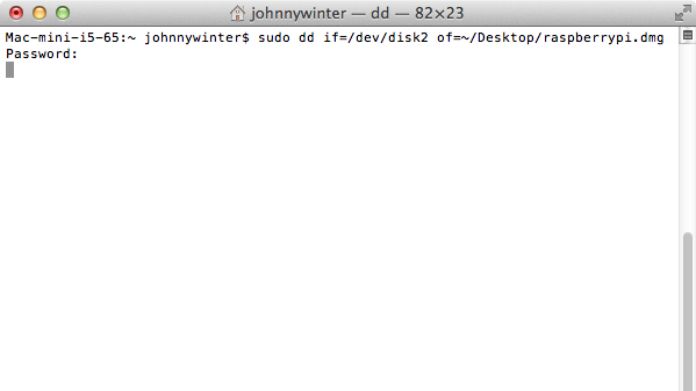 To back up:
sudo dd if=/dev/rdiskN of=~/pi_backup.img bs=1m
To restore:
sudo dd if=~/pi_backup.img of=/dev/rdiskN bs=1m
Note: Use rdisk for faster read/write speeds on macOS.
Cloning Directly on the Raspberry Pi (SD to SD or SSD)
If you have your Raspberry Pi booted up and ready, you can clone Raspberry Pi SD Card directly on it.
Option 1: Using the SD Card Copier (GUI Method)
- On Raspberry Pi OS Desktop, open Accessories > SD Card Copier.
- Choose the source (your current card) and destination (new SD or SSD).
- Click “Start“ and let it do the work.
No command line, no hassle.
Option 2: Using dd on Raspberry Pi OS Lite (Headless)
If you’re running the Lite version, use:
sudo dd if=/dev/mmcblk0 of=/dev/sdX bs=4M status=progress
(Replace sdX with your external card or SSD)
Booting from SSD: Set the Right Priority
After cloning to an SSD, you might need to change the boot order:
sudo raspi-config
- Go to Advanced Options > Boot Order
- Select USB Boot
Done! Now your Pi will boot from the SSD instead of the SD card.
Tips & Troubleshooting
- Use the right card size: Your target card must be the same size or larger than the original.
- Be careful with dd: One typo can overwrite the wrong drive. Double-check everything.
- Want to save space? Use tools like PiShrink to compress your image file.
- Test your Clone: Before deleting anything, boot the Clone and confirm it works.
Final Thoughts
Learning how to clone Raspberry Pi SD card isn’t just for tech wizards; it’s for anyone who values their time, effort, and creative energy.
Cloning allows you to experiment with Linux without losing everything, whether it’s for constructing a home automation system, teaching your children to code, or simply enjoying the experience.
Beware of the impending disaster and act now.’ Take away that SD card, relax, and proceed with crafting.


